How to Wax a Surfboard
A slipped front foot on takeoff is almost never a board problem. It is usually a wax problem, and it costs about six dollars to fix. Wax is the only thing standing between your feet and a smooth fiberglass deck, yet most surfers pick a bar by colour and rub it around until something sticks. The two decisions that matter are which temperature grade you buy and how you build the bumps, and both are settled by the wax makers themselves. This guide pulls the published temperature ranges from Sex Wax and Sticky Bumps together with the application technique surf coaches teach, then sets out the sequence in the order you should actually do it. Southern hemisphere surfers switching into winter water and northern surfers deep in summer both need a grade change right now, so it is a good week to strip the deck back and start clean.
Original Surfex illustration.
Surfex aggregates published manufacturer specifications and coaching guides, and normalises every score to a /10 scale. Every source links to its original page.
Five published sources agree on the same short version. Lay a hard basecoat once, add a topcoat graded to the water you actually surf, build the bumps with circles rather than smears, and top up before each paddle-out instead of waiting for the deck to go slick.
Why wax matters more than most gear
The deck of a polyurethane or epoxy board is a smooth, sealed surface. Nothing about it grips a wet foot. Surf wax solves that by holding a layer of raised bumps, called bead, that your feet, chest and knees can catch on.
Conatus Surf Club makes the sharper point that a slick deck changes how you surf rather than just whether you fall. Surfers on bad wax paddle tentatively, grip with their toes and hesitate on takeoff. That is a lot of performance to lose over a bar of wax. It is also the cheapest fix on the whole board, cheaper than any set in our fin review index.
Pick the grade by water temperature
Every manufacturer sells the same four broad grades: cold, cool, warm and tropical. Wave Equation's survey of the market puts it plainly, noting there is no formal standard but a defacto one that most brands follow. Sticky Bumps publishes its Original range as cold at 15 °C / 60 °F and below, cool at 14–19 °C / 58–68 °F, warm at 19–28 °C / 64–74 °F and tropical at 24 °C / 75 °F and above.
Sex Wax runs colour-coded labels across the same span, with the yellow label rated to 14 °C / 58 °F and below and the blue tropical label starting at 26 °C / 78 °F. The bands overlap on purpose. Wax that is too hard for the water never forms bumps, and wax that is too soft turns into a slick smear within one session. Check the water temperature the same way you would before choosing neoprene in our wetsuit thickness guide.
Basecoat first, topcoat second
A basecoat is a harder formula whose job is structural. It builds a stable texture that survives being stood on and holds the softer topcoat in place instead of letting it rub off under your back foot. Skip it and the topcoat migrates within a couple of surfs.
Sex Wax adds the one rule people forget: choose a basecoat hard enough for the warmest water you will encounter before your next strip. If you are flying somewhere tropical, or your local water is about to warm up by five degrees, lay the harder basecoat now. That single choice is what stops a deck turning to soup halfway through a trip to the Mentawais.
Circles, not cross-hatch
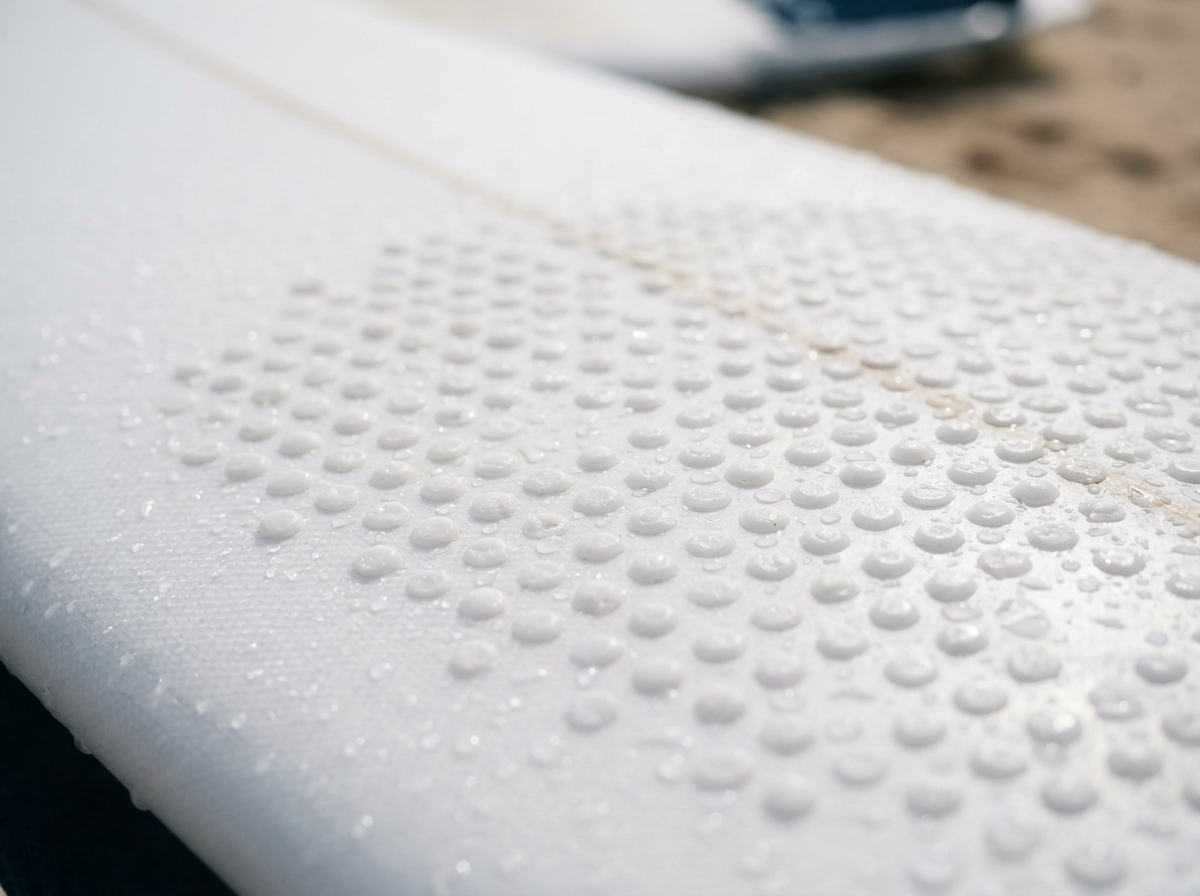
There are two schools of application. Cross-hatching draws diagonal lines in both directions; circular work builds bead with small overlapping rings. Coaches lean strongly toward circles because a pre-drawn cross-hatch looks tidy while sitting flat, and flat wax does not grip.
Use light pressure. The bumps form where the topcoat catches on basecoat texture, so grinding the bar into the deck flattens the exact structure you are trying to build. Two minutes of gentle circles beats thirty seconds of hard scrubbing.
Where the wax actually goes
Cover from the tail forward to a hand-span past where your front foot lands. Shortboarders can stop there. If you paddle long stretches, or ride a longboard where you walk the deck, carry the wax further up and add a chest patch. Waxing the whole nose of a performance shortboard just gives you a mess to clean off later.
Rails matter more than people expect. Duck-diving and pop-ups both start with hands on the rail line, and a bare edge there costs you the takeoff before your feet are involved.
Stripping and starting again
Old wax greys, packs down and collects sand until it stops forming bumps at all. Strip the board fully at least once a year, and always when you change climates. Warm the deck briefly in the sun, scrape with the straight edge of a comb, then clean the film with a wax remover or a citrus solvent.
Keep the heat gentle. Leaving a dark board baking in direct sun to melt the wax risks delamination, which is a far more expensive problem than a dirty deck.
Common mistakes
- Buying wax by air temperature rather than water temperature.
- Skipping the basecoat, then wondering why the topcoat vanishes under the back foot.
- Pressing hard and flattening the bead you just built.
- Travelling to warm water on a cold-water basecoat.
- Blaming the board for slipping when the real issue is a grey, packed-down deck. If the board genuinely feels too small, check it against our volume calculator.
What to do this week
Look up your local water temperature, buy one basecoat and one topcoat in the matching band, and give the board ten minutes before your next surf. If you are heading into a season change, strip it first rather than layering a new grade over the old one. Then spend the attention you save on the gear that actually needs research, starting with the fin guide and the reviews in shortboards.
What the sources say
| Source | Score | Key takeaway |
|---|---|---|
| Mr. Zog's Sex Wax — Quick Humps / Dream Cream user guide | 9.5 / 10 | "If increasing temperatures will soon be realized due to seasonal change or travel then make sure your basecoat is hard enough for the warmest conditions that will be encountered." |
| Sticky Bumps — Original surf wax temperature grades | 9.2 / 10 | "Original Cold 60F/15C and below, Original Cool 58-68F/14-19C, Original Warm 64-74F/19-28C, Original Tropical 75F/24C and above." |
| Conatus Surf Club — A surf coach's guide to surfboard wax | 9.0 / 10 | "Proper application requires building textured bead through circular motions rather than smearing. Match your topcoat to water temperature, wax before every session, and strip completely at least once a year or when changing climates." |
| Wave Equation — Surf wax temperature ranges | 8.6 / 10 | "There is not a standard definition for surf wax temperature ranges, but there is a defacto basic standard that many waxes conform to." |
| Wikipedia — Surf wax | 8.3 / 10 | "Surf wax is a formulation of natural and synthetic waxes applied to the deck of a surfboard to keep the surfer from slipping off." |
The full sequence
- 1Start with a clean, dry deck
Strip old wax with a comb edge and a wax remover, or warm the board in the sun for a few minutes and scrape while the wax is soft. Wipe the deck dry before anything new goes on.
- 2Lay a basecoat
Rub a hard basecoat bar across the deck in long strokes, then again at right angles, until a faint grid of texture appears. Cover from the tail to a hand-span past where your front foot lands, plus the chest area if you want paddling grip.
- 3Build bead with circular motions
Switch to a topcoat matched to your water temperature and work in small overlapping circles with light pressure. Bumps form where the wax catches on the basecoat texture, so let the bar find them instead of pressing hard.
- 4Check the coverage under light
Tilt the board toward the sun. Even bead reflects light evenly. Bald patches near the tail and rails are the spots that cost you traction on takeoff, so fill those before you paddle out.
- 5Top up before every session
Thirty seconds of fresh topcoat over the existing bead is enough on most days. A full strip is only needed once the wax turns grey and flat, or when you move to different water.
Video guides

Related reading
FAQ
How do you wax a surfboard step by step?
Clean and dry the deck, rub a hard basecoat across it in two crossing directions until a grid of texture appears, then work a temperature-matched topcoat over that in small circles until even bumps form. Cover from the tail to a hand-span past your front foot, and top up with topcoat before each session.
Which surf wax temperature should I buy?
Match the topcoat to water temperature, not air temperature. Sticky Bumps Original grades run Cold at 15 °C / 60 °F and below, Cool at 14–19 °C / 58–68 °F, Warm at 19–28 °C / 64–74 °F and Tropical at 24 °C / 75 °F and above. Sex Wax uses colour-coded labels across the same span.
Do I need a basecoat as well as a topcoat?
A basecoat is a harder formula that holds its texture under foot and stops the softer topcoat rubbing away. Sex Wax advises picking a basecoat hard enough for the warmest water you expect before the next strip, which matters if you are travelling somewhere tropical or a season is turning.
How often should you re-wax a surfboard?
Add a light topcoat before nearly every session, since fresh wax restores the bead in about thirty seconds. Strip the board back to bare deck once the bead flattens and greys, roughly once or twice a year for regular surfers, or immediately when you move between climates.
Should you wax in circles or a cross-hatch pattern?
Published guides favour circular motions because they build raised bead, while smearing or drawing a decorative cross-hatch tends to flatten the surface. Cross-hatch strokes are useful for laying the basecoat grid, then circles go over the top.
How do you remove old surf wax?
Leave the board in the sun for a few minutes to soften the wax, scrape it off with the straight edge of a wax comb, then clean the residue with a dedicated wax remover or a citrus solvent. Keep dark boards out of prolonged direct heat to avoid delamination.
Aggregated from 5 independent published sources and 2 video guides.